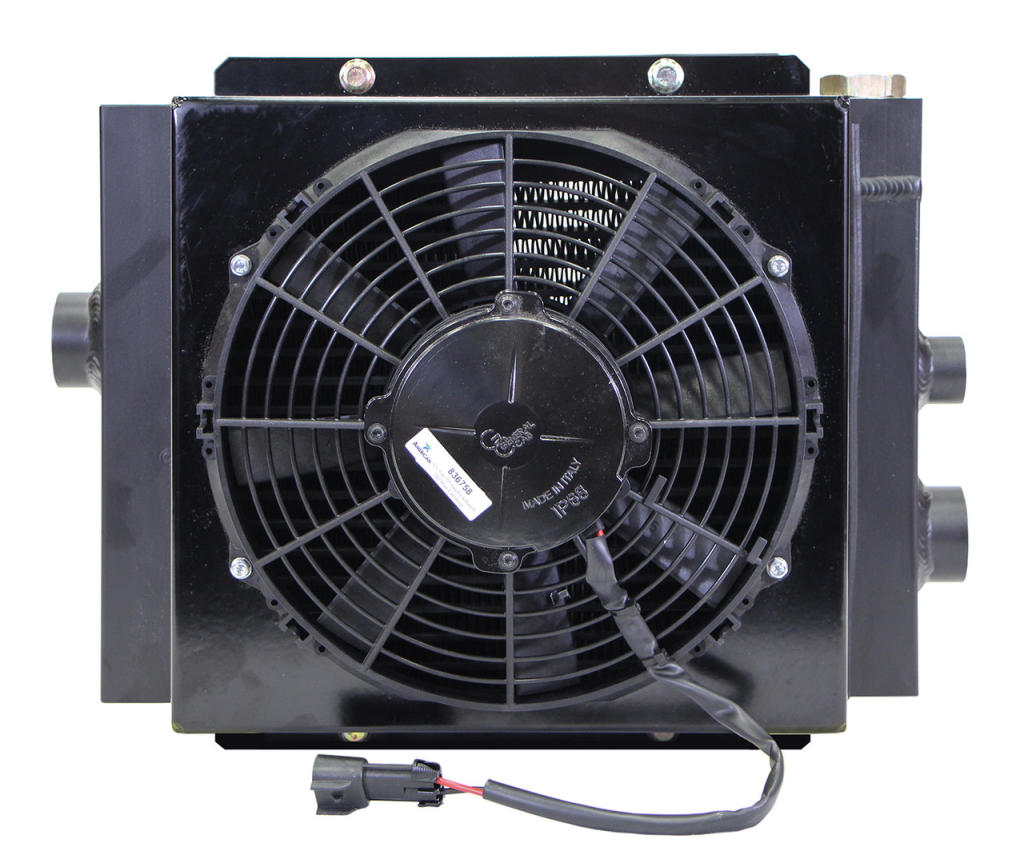
What are hydraulic coolers?
Hydraulic coolers play an important role in the hydraulic system. Their main function is to reduce the temperature of the hydraulic oil, ensure the normal operation of the system and extend the service life of the equipment. In this article, we will introduce you to the operation procedures of the hydraulic cooler, precautions, cleaning methods and general troubleshooting methods.

How to use hydraulic plugs
Перед запуском гидравлического охладителя необходимо выполнить следующие проверки и рабочие процедуры:
Check the attachments and sensors
Before starting, it is necessary to carefully inspect all nozzles and sensors to ensure that the connections are tight and have no play. This is necessary to prevent leaks and equipment damage due to poor connections during starting.
Preparing to drain the oil
Loosen the screw plug located on the outside of the oil outlet of the cooler. Then slowly open the oil inlet valve (at this time, the oil drain valve is closed). When the oil flows out, close the inlet valve and tighten the screw plug. The purpose of this step is to remove air from the system. And to ensure that the hydraulic oil can flow freely into the cooler.
Preparing for ventilation
Loosen the air bleed valve in the cooler line and slowly open the water inlet valve (the drain valve is closed at this time). When the water is filled, close the water inlet valve and the outlet valve. At this time, the water and oil are in a static state, the temperature difference gradually decreases. The purpose of this step is to ensure that the cooling water is filled with cooler and remove air from the system.
Start operation
When the water temperature rises by 5-10 ℃, open the cooling water and oil discharge valve. Then gradually open the cooling water and oil supply valve so that both are in a flow state. Then adjust the cooling water flow to maintain the oil temperature in normal working condition. This step ensures effective heat exchange between the cooling water and the hydraulic oil in the cooler. This can maintain the normal working temperature of the system.+
Stop the operation
When the cooler stops working due to malfunction or normal condition. The operating procedure is to first close the oil and cooling water inlet valve. Then close the oil and cooling water outlet valve. And finally, unscrew the screw plugs on the drain and oil holes to drain the cooling water and oil from the cooler. This procedure ensures that there is no residual liquid inside the cooler when it stops working, and prevents corrosion and icing.

Precautions when using hydraulic coolers
When starting the cooler, avoid opening the inlet valve quickly to prevent the formation of a poorly conducting “supercooling layer” on the surfaces of the heat exchange tubes due to excessive coolant flow through the cooler. This layer significantly reduces the cooling efficiency, even with sufficient water volume.
To prevent electrochemical corrosion from the water side, install a zinc rod at certain points in the inlet and outlet covers. The zinc rod effectively counteracts the electrochemical effects in the coolant, prolonging the service life of the cooler. Purified fresh water should be used as the coolant.
If river water is used, ensure that a filter is installed at the inlet to prevent impurities and microorganisms from entering, reducing pipe clogging and corrosion. Maintain lower coolant temperatures and higher flow rates to improve heat transfer and prevent scale formation on pipe surfaces.
Ensure that the oil side pressure of the cooler exceeds the water side pressure to prevent coolant from entering the hydraulic oil, keeping the system clean. During cold weather when the cooler is not in operation, drain the water completely to prevent freezing and subsequent expansion, which can damage the cooler.

How to clean hydraulic coolers?
During long-term operation, the hydraulic cooler accumulates deposits on the inner walls of the pipes, which leads to a decrease in heat exchange efficiency and suboptimal cooling performance. Depending on the water quality, it is recommended to conduct internal inspections and cleaning every 5-10 months.
The cleaning process includes the following methods: On the water side, use a hose to high-speed wash the front and rear covers and the inner surfaces of the heat exchange tubes. During brush cleaning, use cleaning tools, and then dry with compressed air. This high-speed washing and brushing effectively removes dirt and scale from both the inner and outer surfaces of the heat exchange tubes. This can ensure continuous efficient heat exchange.
On the oil side, use solvent flushing methods: use trichloroethylene solution circulating inside the cooler. Maintain a pressure of no more than 0.6 MPa, preferably against the flow direction of the hydraulic oil. The duration of flushing depends on the degree of contamination. After that, flush with clean water until the waste water is clear. Trichloroethylene solution effectively dissolves oil side deposits and carbon deposits, keeping the heat exchanger tubes clean.
Alternatively, soak the cooler in a soaking solution for 15 to 20 minutes, checking the color of the solution. Replace with fresh solution if corrosion is evident, soaking until completely clean, then rinse thoroughly with clean water. (If using carbon tetrachloride for cleaning, ensure proper ventilation to avoid toxicity.) The soaking method ensures a more thorough removal of deposits and carbon deposits from the heat exchanger tubes, ensuring effective cleaning.
After cleaning, perform a hydraulic test or pneumatic test at 0.7 MPa to check the integrity and seal strength of the cooler before reinstalling it into the system, thereby ensuring its reliable operation.

Machine Service Manual and Warranty
To maintain optimum performance of hydraulic coolers. Regular cleaning every 5-10 months is necessary to prevent reduction in heat exchange efficiency due to internal deposits, taking into account water quality. Cleaning includes high-speed rinsing of covers and tubes with clean water and brushing followed by air drying.
To effectively clean the oil side, use a trichloroethylene solution followed by rinsing with water or immersion in a cleaning solution. After cleaning, perform a pressure test to verify seal integrity. Our commitment to quality includes a comprehensive one-year warranty on the entire machine, ensuring reliable operation and customer satisfaction.


